Essential Pre-Wash Tips for Achieving a Cleaner, Sparkling Car
Ever pulled up to a car wash only to realize your vehicle looks like it's been through a mud wrestling match? You're not alone. Pre-washing your car is the unsung hero of achieving that showroom shine without the frustration of stubborn dirt. In this guide, we'll dive into practical pre-wash tips that make the entire washing process smoother, more effective, and even a bit more enjoyable. Whether you're tackling it at home or heading to a professional service, these steps will help you get a cleaner car every time.
By preparing your ride properly before the main wash, you can remove loose debris, prevent swirl marks, and extend the life of your paint job. Let's explore why pre-washing is crucial and how to do it right.
Why Pre-Washing Your Car Matters
Pre-washing isn't just an extra step—it's a game-changer for your car's appearance and health. Think of it as the appetizer to a great meal; it sets the stage for everything else. Without it, you're more likely to drag grit across your paint during the wash, leading to micro-scratches that dull the finish over time.
The Key Benefits of a Good Pre-Wash
First off, pre-washing loosens and removes the bulk of contaminants like mud, bird droppings, and road salt. This reduces the pressure needed in the main wash, meaning less risk to your clear coat. According to automotive experts, regular pre-washing can cut down on water usage by up to 30% because you're not fighting embedded grime.
Another perk? It saves time. A quick pre-wash at home means your car arrives at the car wash already partially clean, allowing for a faster, more thorough professional detail. If you're using a directory like LocalWashAdvisor to find nearby car washes, you'll appreciate how this prep work enhances the value of any coupons or services you book.
Finally, pre-washing protects your vehicle's undercarriage and wheels from corrosive elements. In areas with harsh winters or coastal salt exposure, this step can prevent rust and prolong brake life.
Gathering the Right Tools and Supplies
Before you start, stock up on the essentials. You don't need a garage full of gadgets—just a few reliable items to make pre-washing efficient.
Must-Have Pre-Wash Tools
-
Pressure Washer or Garden Hose with Nozzle: A pressure washer (around 1500-2000 PSI for home use) blasts away loose dirt without damaging paint. If you don't have one, a hose with an adjustable nozzle works fine for lighter jobs.
-
Pre-Wash Foam Cannon or Bucket with Grit Guards: Foam cannons attach to your pressure washer for even coverage. For manual methods, use two buckets—one for soapy water and one for rinsing—to avoid reintroducing dirt.
-
Microfiber Mitts or Brushes: Opt for soft-bristled wheel brushes and chenille microfiber mitts to gently agitate without scratching.
-
Eco-Friendly Pre-Wash Solution: Look for pH-neutral soaps designed for pre-soaking. These break down oils and grime without stripping wax.
Safety Gear and Eco Tips
Wear gloves to protect your hands from chemicals, and consider old clothes or an apron. For the environment, choose biodegradable products and avoid letting runoff enter storm drains. Many modern pre-wash formulas are water-efficient, aligning with sustainable car care practices.
Budget-wise, a basic setup costs under $100 and pays for itself after a few uses, especially if you're skipping professional preps.
Step-by-Step Pre-Wash Process
Now, let's get into the action. Follow these steps in order for the best results. Aim to pre-wash every two weeks or after exposure to heavy contaminants.
Step 1: Park in the Right Spot and Cool Down
Choose a shaded area to prevent water spots from drying too quickly—direct sun can bake soap onto your paint. If your car's been driving, let the engine cool for 20-30 minutes. Hot surfaces can cause soap to evaporate unevenly.
Pro tip: If it's windy, face the car into the breeze to blow away loose leaves or dust before you begin.
Step 2: Dry Dusting and Initial Rinse
Start with a dry microfiber towel or blower to remove loose dust from the body, wheels, and glass. This prevents grinding it in later.
Next, give the entire car a high-pressure rinse from top to bottom. Begin at the roof and work down, using a wide fan spray to loosen dirt without concentrating force on one spot. Pay extra attention to the undercarriage—tilt the nozzle to flush out mud from wheel wells.
For wheels, use a dedicated brush to agitate brake dust. Avoid household cleaners here; they can corrode alloys.
Step 3: Apply Pre-Wash Solution
Mix your pre-wash soap according to instructions—usually a capful per gallon of water. Using a foam cannon or sprayer, apply generously from bottom to top. This allows gravity to pull foam downward, carrying dirt away.
Let it dwell for 3-5 minutes, but don't let it dry. The solution's surfactants will emulsify oils and lift grime. For tough spots like bug splatter on the front bumper, spot-treat with a citrus-based degreaser.
If you have textured surfaces like plastic trim, a soft brush helps here without being abrasive.
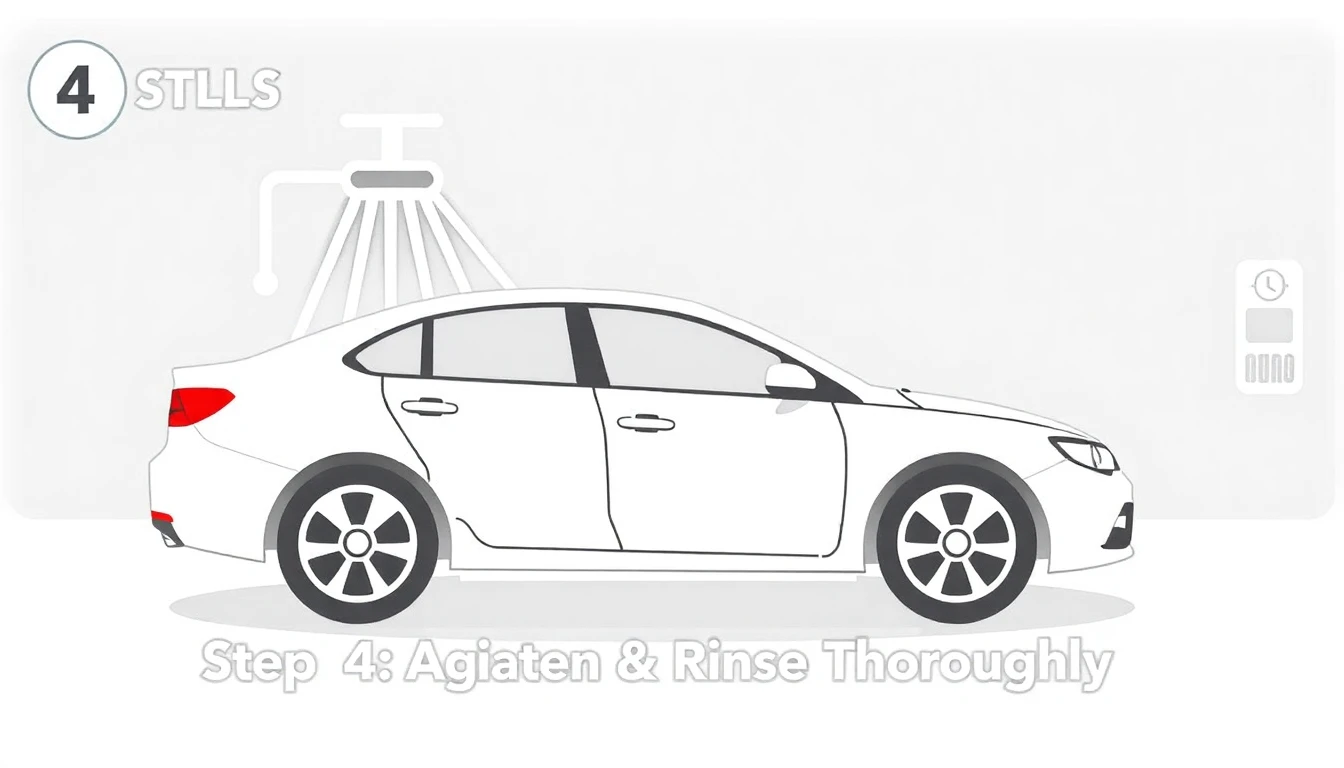
Step 4: Agitate and Rinse Thoroughly
Gently agitate with your microfiber mitt in straight lines (not circles) to avoid swirls. Work in sections—roof, hood, sides, then rear.
Rinse immediately with your hose or pressure washer, again top to bottom. Ensure all soap is gone; residue can attract more dirt.
For the engine bay, a quick low-pressure rinse removes surface grime, but cover sensitive electronics with plastic bags first.
Step 5: Wheel and Tire Special Treatment
Wheels often harbor the grimiest buildup. After the body rinse, apply a wheel-specific cleaner to rims and tires. Let it fizz for a minute, then scrub with a dedicated brush.
Rinse well, and for tires, use a dressing afterward to protect against cracking. This step alone can make your car look 10 years younger.
Advanced Pre-Wash Tips for Tough Contaminants
Sometimes, everyday grime needs extra attention. Here's how to handle specific challenges.
Dealing with Bird Droppings and Tree Sap
Act fast—these are acidic and etch paint if left on. Soften with a pre-wash soak, then gently scrape with a plastic edge tool. Follow with clay bar decontamination for smooth results.
Winter Salt and Road Grime Removal
In colder climates, salt accelerates corrosion. Use a salt-neutralizing pre-wash and focus on the underbody. A driveway ramp can help access hard-to-reach areas.
Bug and Tar Removal
For insects on the grill, a dedicated bug remover spray works wonders. For tar, apply a petroleum-based solvent sparingly, then rinse.
Common Pre-Wash Mistakes to Avoid
Even pros slip up sometimes. Steer clear of these pitfalls for flawless results.
-
Using Too Much Pressure: Over 2000 PSI can strip wax or damage seals. Start low and adjust.
-
Skipping the Rinse: Leftover dirt redeposits during drying, undoing your efforts.
-
Washing in Direct Sun: Heat causes spotting; early morning or evening is ideal.
-
Ignoring the Interior: While pre-washing exteriors, vacuum mats to prevent tracking dirt inside.
By avoiding these, you'll maximize your clean and minimize frustration.
When to Take It to the Pros
Pre-washing at home is empowering, but for deep cleans or if time's short, pros have industrial tools. Platforms like LocalWashAdvisor make it easy to locate top-rated car washes nearby, complete with user reviews and exclusive coupons for pre-wash-inclusive services.
Look for self-serve bays with pre-soak options or full-service spots offering touchless pre-washes. In 2026, many incorporate eco-friendly tech like water recycling, aligning with modern car care standards.
Post-Pre-Wash: Transitioning to the Main Wash
After pre-washing, dry with a blower or chamois to avoid water spots. Inspect for any remaining issues—now's the time for touch-ups.
Move seamlessly into your main wash: shampoo the body, clean glass, and apply protectant. This combo yields a deeper clean than washing alone.
Long-Term Benefits and Maintenance Advice
Incorporating pre-washes into your routine isn't just about aesthetics—it's maintenance. Cleaner paint repels contaminants better, reducing the need for frequent waxes.
Track your schedule: urban drivers might need weekly preps, while rural folks focus on seasonal mud. Pair with regular inspections for chips or scratches.
Invest in quality products from trusted brands to avoid cheap soaps that leave residue. Over time, this habit can save on repairs and keep resale value high.
Final Thoughts on Pre-Washing for a Cleaner Car
Mastering pre-wash tips transforms car care from a chore into a satisfying ritual. With the right prep, your vehicle will gleam brighter and last longer. Next time you're gearing up, remember these steps—they're your ticket to a cleaner, happier ride. If you're searching for local pros to handle the heavy lifting, check out directories like LocalWashAdvisor for convenient options and deals.
Ready to shine? Grab your hose and get started today!
Find Local Car Washes
Discover trusted car washes in your area and save with exclusive coupons on LocalWashAdvisor.
Browse Car WashesThis article was created by Shine, our AI Car Care Advisor, to provide helpful information about car care and local services.
Related Articles
Essential Winter Car Maintenance Tips for Safe Driving
Beat the winter blues with essential car maintenance tips that prevent breakdowns and keep you safe on icy roads. Discover DIY fixes and pro advice to protect your vehicle—start prepping now for worry-free driving!
Ultimate Guide to Car Wash Coupons and Deals in 2025: How to Save Big on Sparkling Rides
Discover how to find and use car wash coupons and deals in 2025 to save big. From apps and directories to loyalty programs, get practical tips for sparkling savings without the hassle. Perfect for budget-conscious drivers!
Self-Service vs Automatic Car Wash: Which Saves More Money in 2026?
Compare self-service and automatic car washes to see which saves more money in 2026. Break down costs, tips, and factors for budget-friendly cleaning. Discover if DIY or convenience wins for your wallet.